Create cell crops with CellProfiler#
While it is possible to segment/annotate and classify objects entirely within Piximi, you can also use CellProfiler to segment individual cells and create single cell cropped images that can be then be opened in Piximi and then categorized.
This guide explains how to create a CellProfiler pipeline that will first identify nuclei using the IdentifyPrimaryObjects module, followed by cell identification with the IdentifySecondaryObjects module. We will then create a multichannel RGB image with DNA colored blue and GFP colored green. Finally, these multichannel RGB images will be cropped based on the previously identified cell object using the SaveCroppedObjects module.
The single cell image crops for the Piximi Human U2OS-cells Cytoplasm Crops example project were made using this workflow. The images are from the BBBC013 cytoplasm-nucleus translocation dataset from the Broad Bioimage Benchmark Collection. The CellProfiler pipeline used in the following example can be downloaded here for CellProfiler version 4.2.2. For CellProfiler 4.2.1 or earlier, download this pipeline.
1. Import images#
To begin, drag and drop your images into the Images input module of CellProfiler.
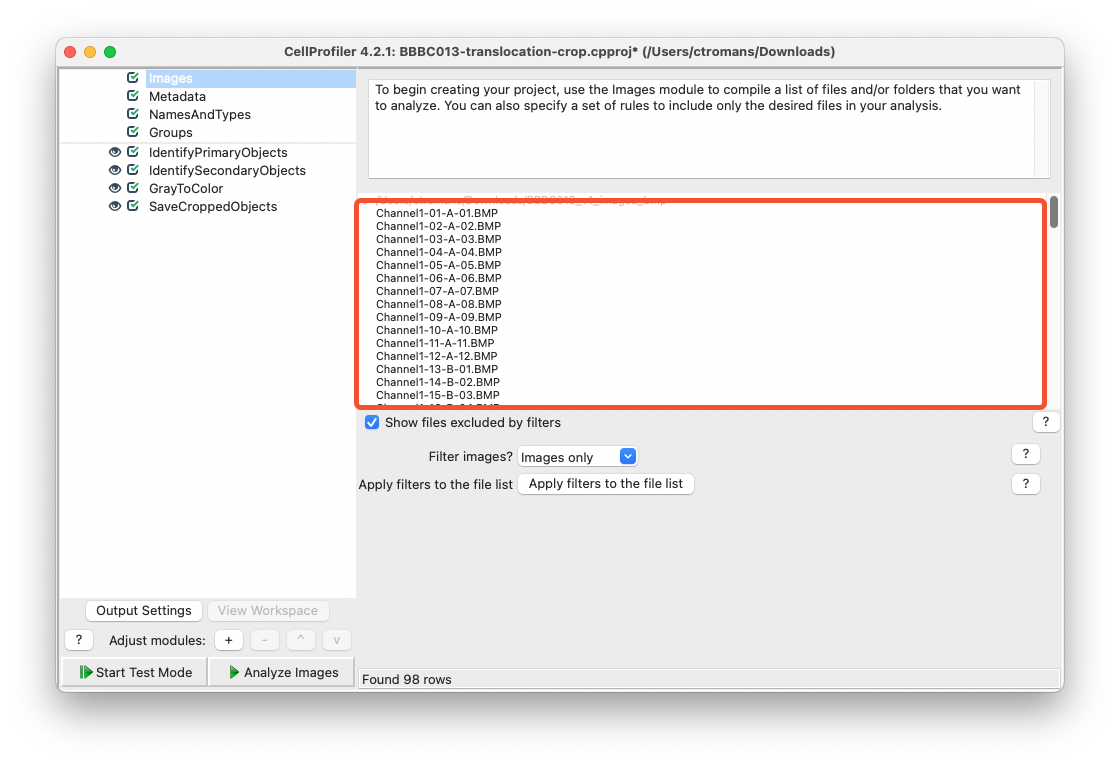
Fig. 28 Drag and drop your images into the Images input module.#
Next, select appropriate rules to categorize your files in the NamesAndTypes input module. In these images, files that contain Channel2 in their filename are assign the name rawDNA and images that contain Channel1 in their filename are assigned the name rawGFP.
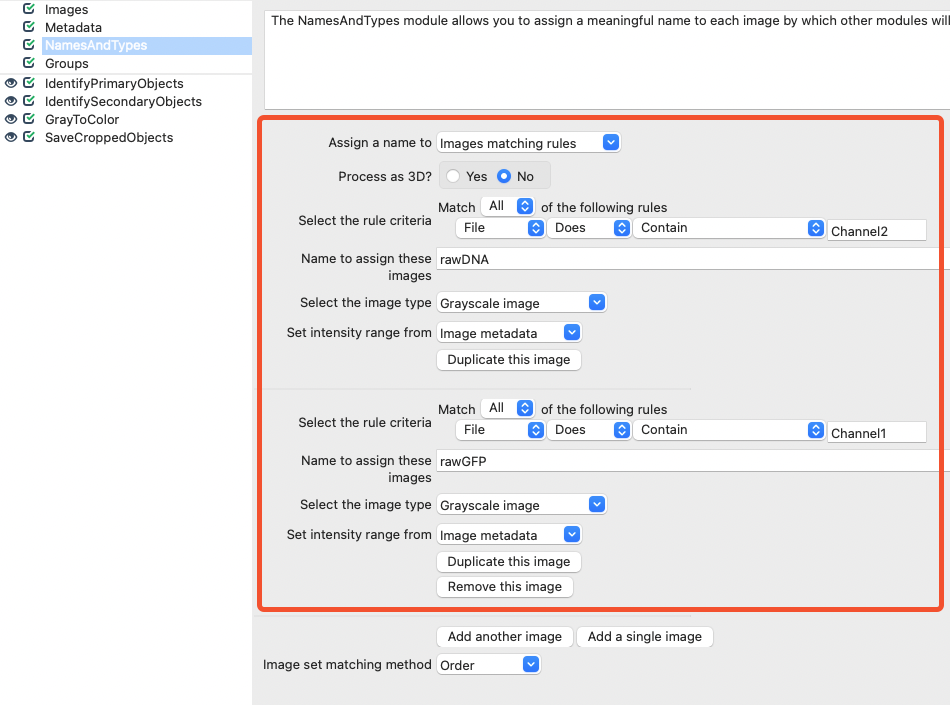
Fig. 29 Within the NamesAndTypes module, assign appropriate names for the DNA and GFP channels.#
2. IdentifyPrimaryObjects#
Then, add an IdentifyPrimaryObjects module and set your DNA image (e.g. rawDNA) as the input image. Name this primary object Nuclei. Adjust the parameters so an appropriate segmentation is achieved while using test mode.
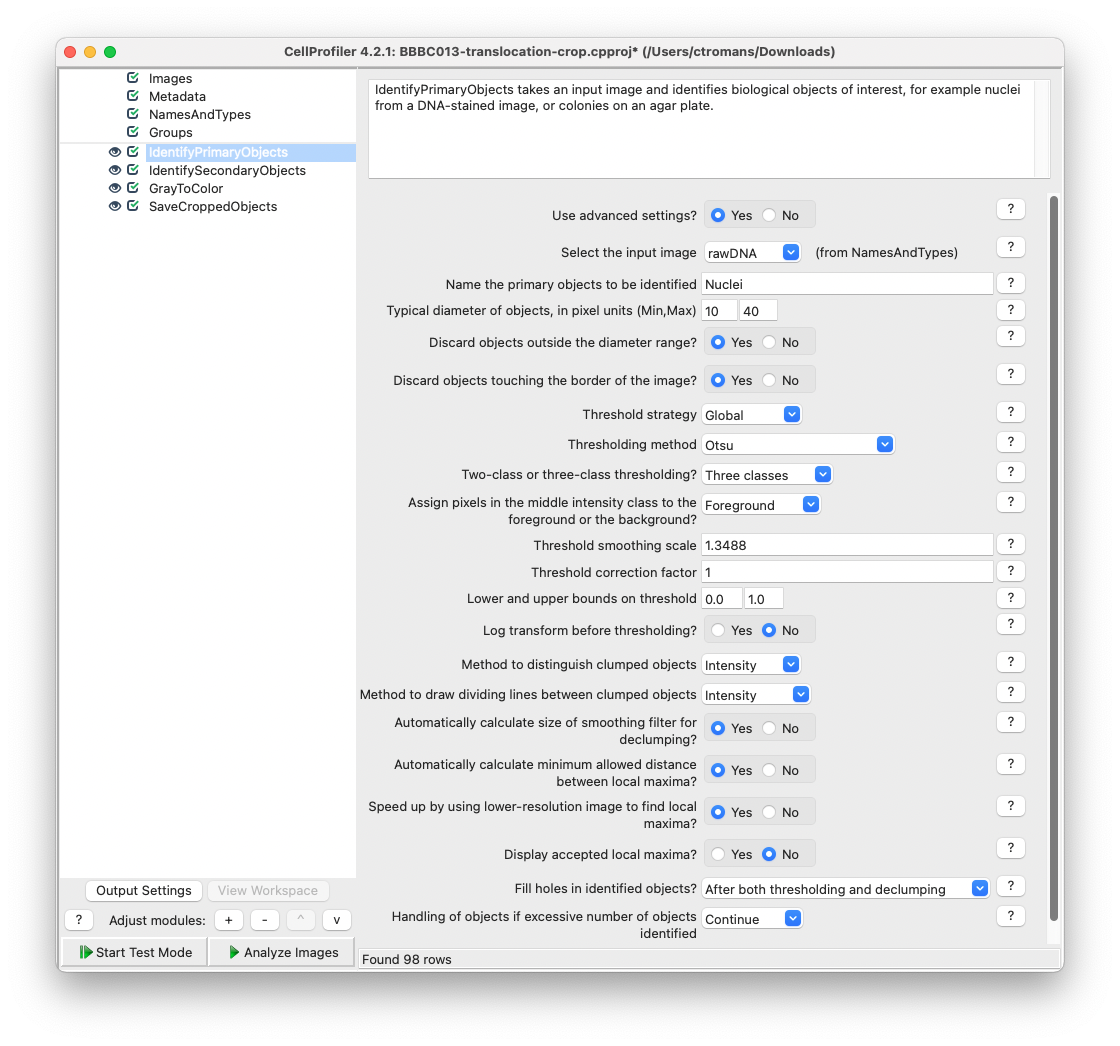
Fig. 30 Add a IdentifyPrimaryObjects module and adjust the parameters to achieve adequate object segmentation of the rawDNA image.#
3. IdentifySecondaryObjects#
Add an IdentifySecondaryObjects module and select the cell image (e.g. rawGFP) as the input image and Nuclei as the input objects. Name this Secondary object Cells. You can tune segmentation parameters to identify your cell objects or set the Distance - N method to identify secondary objects with a distance that captures the edge of most cells (e.g. 10).
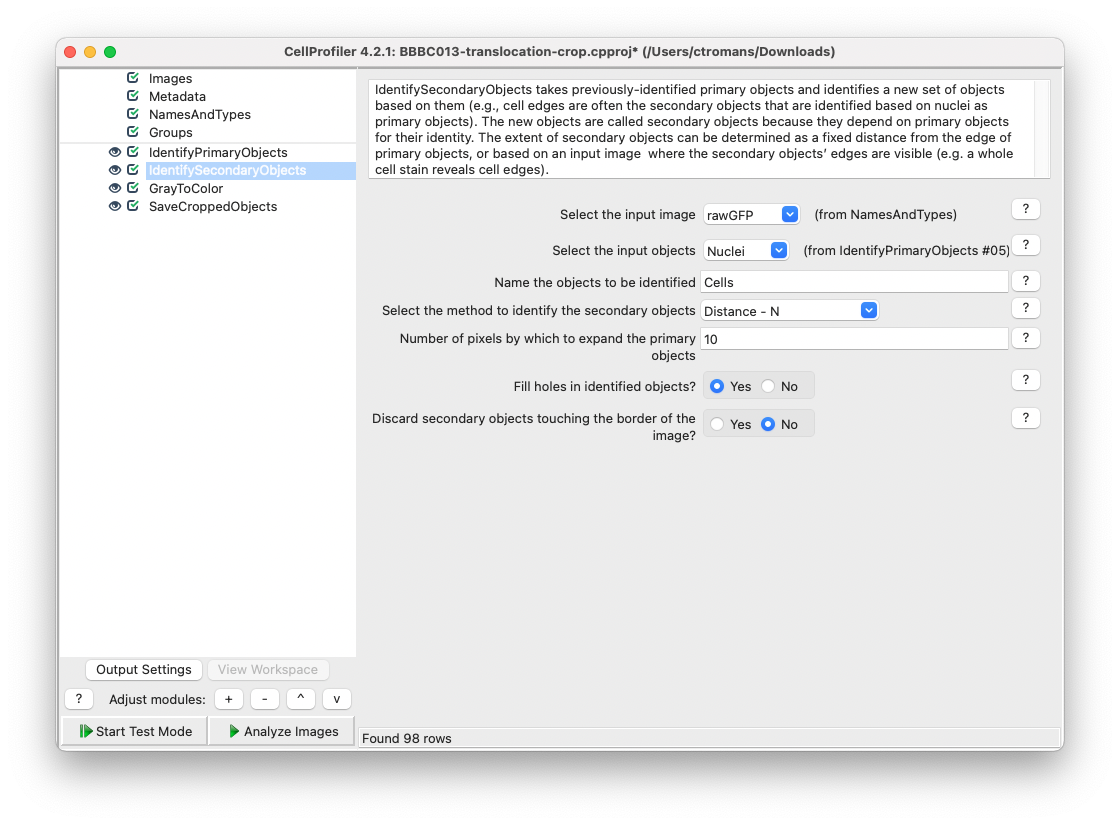
Fig. 31 Add a IdentifySecondaryObjects module using the rawGFP as an input image and Nuclei as in input object.#
4. GrayToColor#
Now, we will create a multichannel RGB image using the input rawDNA and rawGFP images. Add a GrayToColor module and select rawGFP to be colored green and rawDNA to be colored blue. Name the output image GFPandDNA.
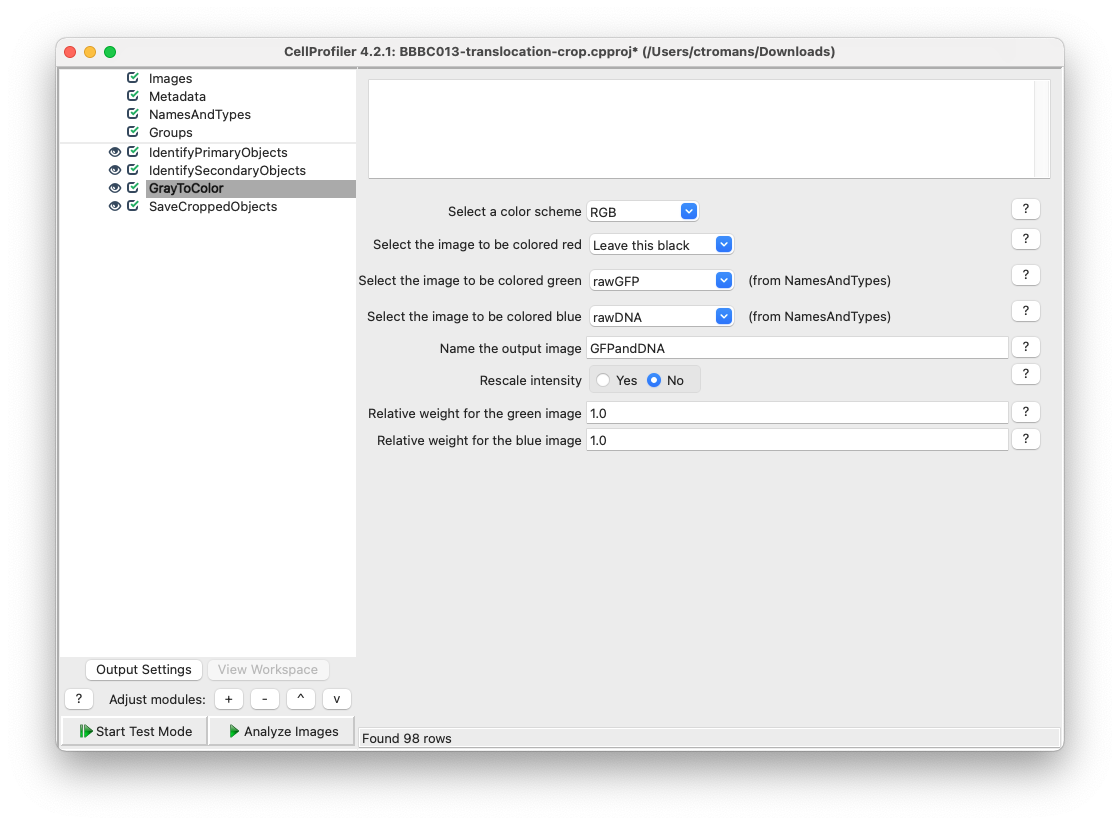
Fig. 32 Add a ColorToGray module and set the rawGFP as green and rawDNA as blue.#
5. SaveCroppedObjects#
Next, add a SaveCroppedObjects module and select the Cells objects from IdentifySecondaryObjects. For the Image to crop setting, select GFPandDNA created by the ColorToGray module. It is this image that will be cropped to individual Cells objects. Select an appropriate directory to save your cropped images.
Pipeline modifications if using CellProfiler 4.2.1 or earlier
CellProfiler versions 4.2.1 and earlier can also be adjusted to save cropped images into subdirectories named after the input filename. This can be achieved by enabling metadata extraction and using the extracted filename in the subfolder output path in SaveCroppedObjects. Below are the changes to the above mentioned pipeline to achieve this result. The above pipeline that has been modified for CellProfiler 4.2.1 can be downloaded here.
1. Enable metadata extraction
In the Metadata input module, select Yes on the Extract Metadata option. In the field marked Regular expression to extract from file name input the regular expression \-(?P<FileName>.*)\.. This will extract the information after the first - and before the last . from the image filenames in the BBBC013 dataset.
Why extract metadata for this portion of the filename?
For each image there are two individual filenames, representing either channel1 or channel2. If you choose to extract the entire filename, SaveCroppedObjects will be unable to reconcile which filename to use and instead use None. By using the regular expression mentioned above, the extracted filename will be the same across the two channels.
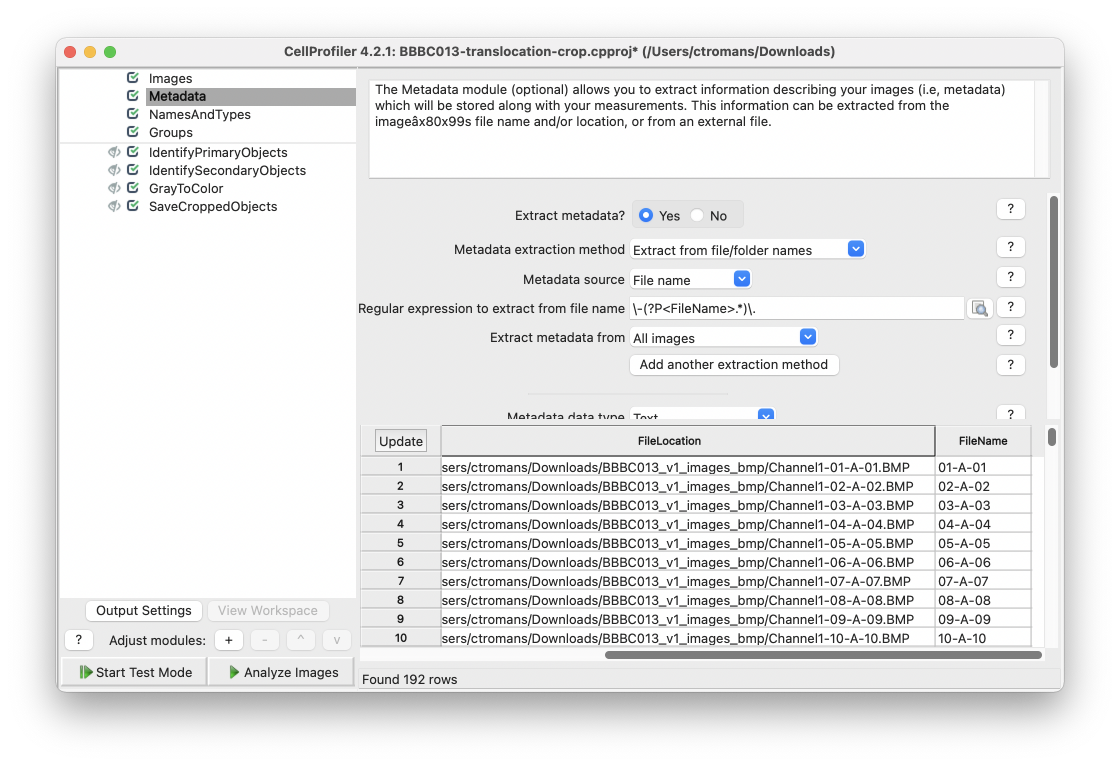
Fig. 33 Use the regular expression \-(?P<FileName>.*)\. to extract an appropriate filename from the BBBC013 images.#
2. SaveCroppedObjects
Within SaveCroppedObjects, select Default Output Folder sub-folder and then right-click in the sub-folder text box and select FileName.
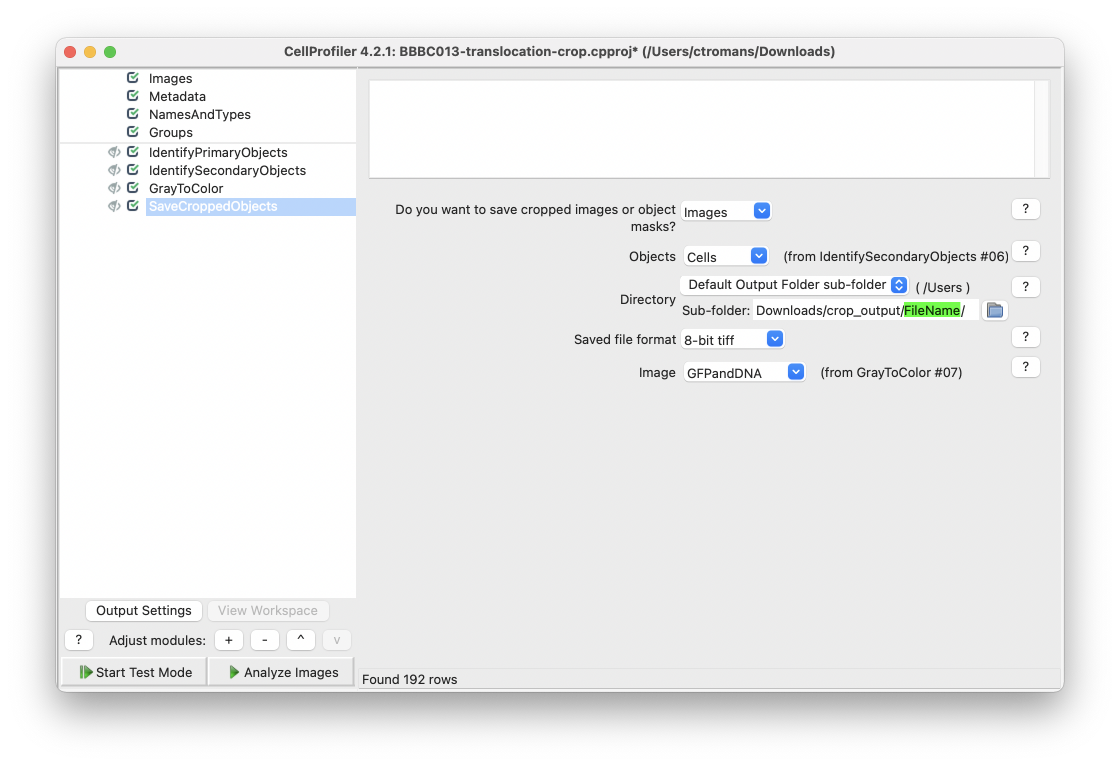
Fig. 34 Right click within the Sub-folder text box and select FileName, as defined in the Metadata module earlier.#
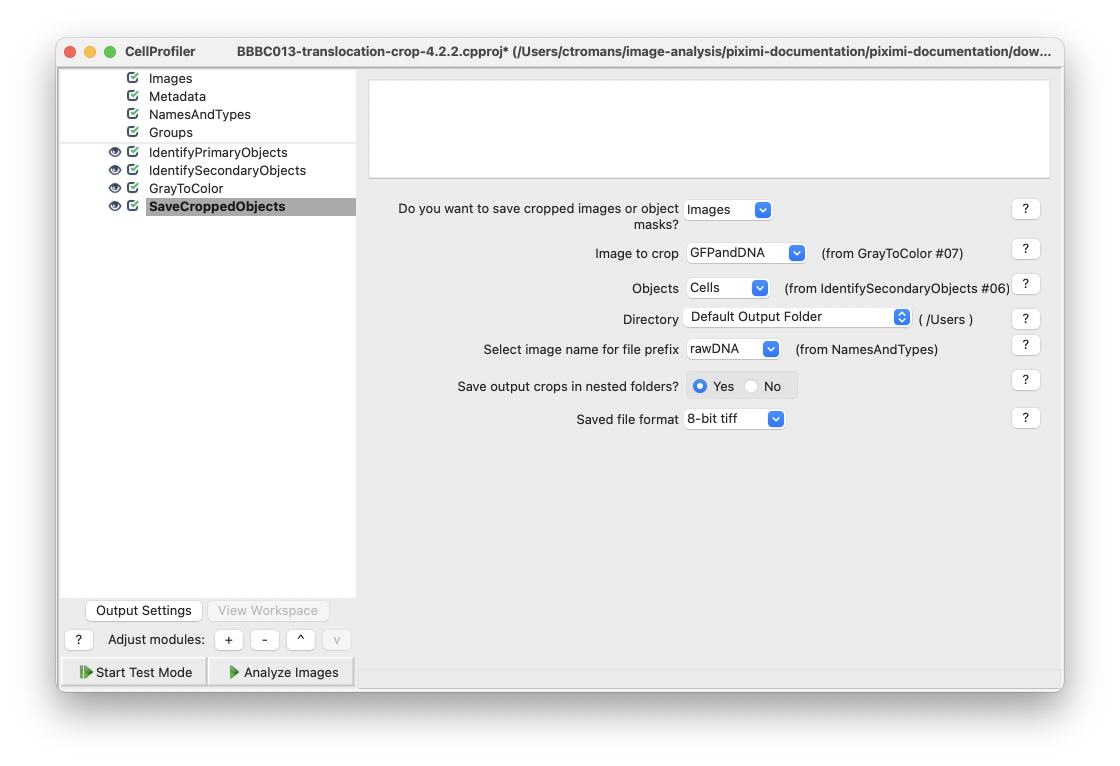
Fig. 35 Add a SaveCroppedObjects module and select your desired Object and the Image to crop. In CellProfiler 4.2.2 you can select to save crops into nested folders with the input image filename.#
Copyright
The BBBC013 images used here are licensed under a Creative Commons Attribution 3.0 Unported License by Ilya Ravkin.